
Introduction
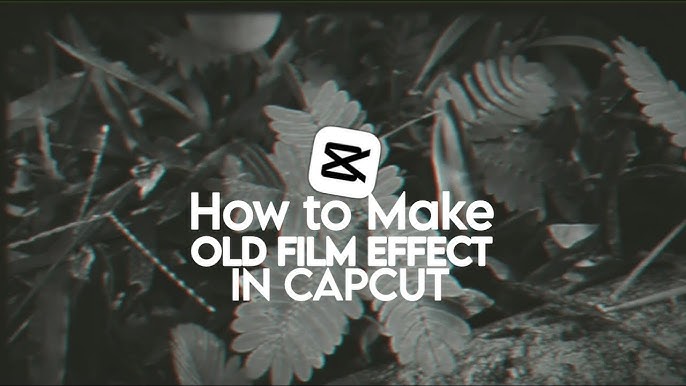
Old Film Overlay Effects For Capcut the evolving world of digital content creation, CapCut has emerged as one of the most popular and user-friendly video-editing applications. What initially began as a simple mobile editor has now grown into a professional-grade creative platform for editors, influencers, YouTubers, and filmmakers. Among its many powerful features, CapCut Overlay Editing stands out as one of the most impactful tools for producing visually engaging and aesthetically pleasing videos. Overlay editing gives creators the flexibility to add layers, aesthetic elements, animations, effects, filters, and transitions that completely transform the look and feel of a video. Whether someone is making cinematic edits, meme clips, aesthetic reels, tutorial videos, or transition-heavy TikTok content, overlays play a significant role in enhancing creativity.
Overlay editing in CapCut goes far beyond adding simple stickers or text. It is about layering multiple visual components to enrich storytelling, intensify emotions, and achieve professional-level editing directly from a smartphone. With overlays, creators can merge images, superimpose clips, add glow effects, apply masks, include animation layers, and even build complex transitions—all without needing advanced editing software like Adobe Premiere Pro or After Effects. This unique blend of simplicity and sophistication is what sets CapCut apart in the mobile editing world.
This essay explores the complete concept of CapCut Overlay Editing, explaining what overlays are, how they work, the different types of overlays available, how to use them effectively, advanced overlay techniques, creative use cases, step-by-step instructions, professional tips, best practices, and the overall role overlays play in modern content creation. By the end of this 3000-word essay, you will have a comprehensive understanding of overlay features and how they elevate the artistic value of digital videos.
What is Overlay Editing in CapCut?
In Old Film Overlay Effects For Capcut terms, an overlay is an additional layer placed over the main video. Just like layers in Photoshop or Premiere Pro, overlays sit above your primary footage and interact with it visually. These layers can be:
- Videos
- Photos
- Stickers
- Text
- Filters
- Light effects
- Glow effects
- Animation clips
- PNG transparent images
- Motion graphics (like particles, sparkles, smoke, fire, neon lines)
CapCut’s Overlay tool allows creators to stack these elements on top of each other, creating depth and visual complexity. This technique is widely used in:
- Aesthetic edits
- Slow-motion videos
- Cinematic transformations
- Travel vlogs
- Gaming edits
- Dance transitions
- Music videos
- Fan edits
- Wedding reels
- Fashion videos
By adjusting opacity, blending modes, speed curves, masking, and keyframe animations, CapCut turns overlay editing into a flexible and professional process.
Why CapCut Overlay Editing Has Become So Popular
The rise in the popularity of CapCut’s overlay features can be attributed to several key reasons:
1. Easy to Use Yet Highly Powerful
CapCut is designed for beginners, but the overlay feature is sophisticated enough for advanced editors. The drag-and-drop interface, intuitive controls, and mobile-optimized design make overlay editing accessible to everyone.
2. Aesthetic Trend Culture on Social Media
Platforms like Instagram Reels, TikTok, and YouTube Shorts thrive on aesthetic visuals. Overlays such as sparkles, hearts, VHS recording frames, neon lights, and particle effects became extremely popular in the editing community.
3. Zero-Cost Professional Editing
CapCut is free, unlike other apps or desktop software that require subscriptions. Overlay editing, which used to need expensive tools like After Effects, can now be done at no cost.
4. Supports Both Simple and Advanced Edits
Whether someone wants to add a simple PNG overlay or create multi-layered keyframe animations, CapCut supports all levels of creativity.
Types of Overlays Available in CapCut
Overlay editing in CapCut covers a wide variety of visual components. Below are the major types:
1. Video Overlays
Creators can place small video clips over the main footage. Examples include:
- Smoke videos
- Fire animations
- Light leaks
- Particles
- Bokeh effects
- Explosions (gaming)
- Abstract shapes
Video overlays add movement and dynamism to the scene.
2. Image Overlays
These include PNG images or transparent graphics used for:
- Frames
- Logos
- Stickers
- Emojis
- Decorations
- Aesthetic shapes
PNG overlays help create a clean, modern visual style for social media.
3. Text Overlays
With CapCut’s rich text features, editors can add:
- Quotes
- Captions
- Call-to-action lines
- Subtitles
- Aesthetic text styles
- Neon text
- Glitch typography
Texts themselves become overlays that enhance storytelling.
4. Filter/Effect Overlays
Effects like:
- Motion blur
- Glowing edges
- Color correction layers
- Distortion
- Film grain
- VHS noise
act as overlays to give the entire video a mood or theme.
5. Masked Overlays
Masked overlays are used to hide certain areas or reveal specific portions of a layer. They enable:
- Split-screen effects
- Face zoom cuts
- Motion tracking
- Object reveal transitions
Masking enhances technical and creative editing possibilities.
How to Add an Overlay in CapCut: Step-by-Step
CapCut makes the process extremely straightforward. Here is a clean and detailed method:
Step 1: Open CapCut
Launch the CapCut app and tap New Project.
Step 2: Add Your Main Video
Select the main clip you want to edit.
Step 3: Tap the “Overlay” Button
On the bottom toolbar, choose Overlay.
Step 4: Click “Add Overlay”
Select an image or video you want to place on top of your main video.
Step 5: Adjust Size and Position
Use pinch gestures to resize or reposition the overlay.
Step 6: Apply Blending Options
Tap Blend to choose from modes like:
- Lighten
- Darken
- Multiply
- Overlay
- Screen
Blending modes help the overlay merge naturally.
Step 7: Add Masking (Optional)
CapCut offers masks like:
- Circle
- Split
- Linear
- Rectangle
- Heart
- Waterdrop
These help create effects like zoom-in transitions or aesthetic shape edits.
Step 8: Add Keyframes (Advanced)
Keyframes animate the overlay. They can:
- Move elements
- Scale overlays
- Rotate graphics
- Create smooth transitions
Step 9: Export
Once satisfied, export in high quality.
Popular Use Cases of Overlays in CapCut
1. Aesthetic Instagram Reels
Creators use sparkles, hearts, butterflies, and color overlays to match trending audio styles.
2. TikTok Velocity Edits
Overlaying flash effects and glow lines enhances velocity transitions.
3. Cinematic Travel Vlogs
Sunlight overlays, lens flares, and film grain create a Hollywood feel.
4. Gaming Montages
Explosions, motion blur overlays, and UI frames add intensity to gaming clips.
5. Wedding and Romantic Edits
Soft bokeh and light leak overlays produce a dreamy effect.
6. Meme Videos
1. Using Blending Modes Like a Pro
Blending modes determine how the overlay interacts with the base footage. Key uses include:
- Screen for sparkles or bokeh
- Multiply for shadow overlays
- Lighten for film textures
- Overlay mode for highlights
Understanding blending modes transforms basic overlay usage into cinematic visuals.
2. Using the Keyframe System
Keyframes enable movement. For example:
- Making a butterfly PNG “fly” across the screen
- Animating neon lines
- Adding smooth zoom cuts
- Tracking text with moving objects
Keyframes bring overlays to life.
3. Masking for Creative Transitions
Masking creates effects like:
- Split-screen
- Wipe transitions
- Face reveals
- Double exposure
- Clone edits
Combining masks with overlays gives a premium editing style.
4. Motion Blur Overlays
Using motion blur as an overlay creates speed effects without manually adjusting motion curves.
5. Glow and Light Overlays
Glowing overlays add energy to music beats, especially in dance reels.
6. Using Green Screen Overlays
CapCut has a Chroma Key tool. Green screen overlays allow creators to:
- Add explosions
- Use neon animations
- Insert moving frames
- Apply motion graphics templates
Green screen overlays are among the most versatile tools.
How Overlay Editing Enhances Visual Storytelling
Overlay editing is not only about adding decoration; it also improves storytelling by:
1. Setting the Mood
Light leaks for romance, grain for nostalgia, neon lines for futuristic vibes.
2. Highlighting Emotions
Text overlays or bokeh visuals bring emotions to the forefront.
3. Improving Focus
Overlays can intentionally guide viewers to the main subject.
4. Creating Rhythm With Music
Beat-sync flash overlays make videos feel more energetic.
5. Adding Narrative Layers
Using multiple overlays allows deeper meaning and symbolism.
Design Principles to Follow While Using Overlays
1. Less is More
Overusing overlays can make the video look cluttered.
2. Maintain Consistent Color Tones
Choose overlays that match the video’s color theme.
3. Sync with the Music
Overlay animations should match the beat for maximum impact.
4. Use High-Quality Elements
Blurry or low-resolution overlays reduce video quality.
5. Maintain Balance
Keep overlays aligned with the subject and frame composition.
Common Mistakes Beginners Make in CapCut Overlay Editing
- Adding too many overlays
- Using mismatched colors
- Overusing glitch or flash effects
- Not adjusting opacity properly
- Not blending overlays with the footage
- Using unclean PNG files
- Placing overlays off-center unintentionally
Avoiding these mistakes elevates editing quality.
CapCut Overlay Editing in Professional Content Creation
Overlay editing in CapCut has attracted not only casual creators but also professionals, including:
- Social media managers
- Digital marketers
- Wedding videographers
- Influencers
- Fitness trainers
- Gaming streamers
Overlays help create brand identity through logos, motion graphics, and consistent templates.
Tips for Mastering Overlay Editing
- Collect HD overlays from trusted sources.
- Use CapCut’s built-in assets for quick edits.
- Experiment with opacity for softer visuals.
- Use speed curves to animate overlays dynamically.
- Learn masking shapes to make creative transitions.
- Practice layering multiple overlay types.
- Save overlay templates for future edits.
Conclusion
CapCut Overlay Editing has revolutionized the way creators produce videos using their smartphones. It gives editors the ability to layer visuals, enhance storytelling, build aesthetics, and experiment with dynamic effects—without needing expensive software or advanced skills. From simple PNG images to complex keyframe animations, overlay editing unlocks unlimited creativity.
Whether you are a beginner exploring social media editing or an experienced creator aiming for cinematic results, CapCut’s overlay tools provide everything needed to create stunning, professional-quality content. As digital media continues to evolve, overlay editing will remain one of the most influential and widely used techniques in video creation.